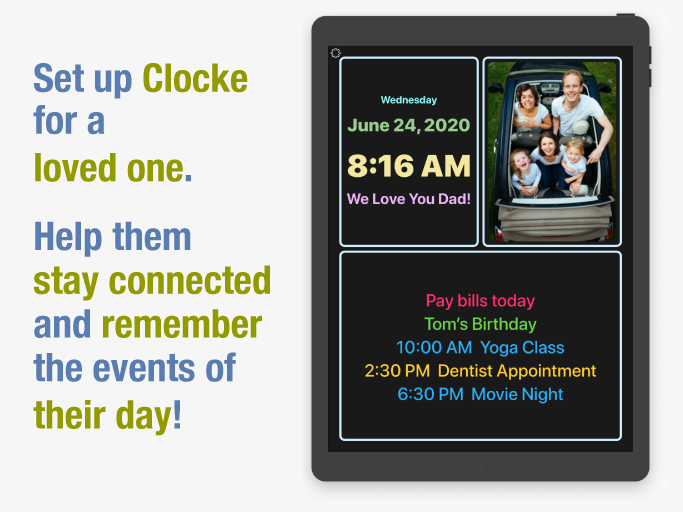
Clocke is a simple and easy to read clock that clearly displays the full day of the week, month, date and a greeting message in
large letters.
Clocke provides structure, routine and focus for people faced with memory loss, Dementia or Alzheimer’s, who often lose the ability to recognize what day it is.
Clocke has a clear and large display that helps reduce anxiety about the time of day and ease the worry of missing an appointment, mealtime, birthday, a favorite TV program, or any other event.
Add comforting photos to the display or add calendar events from personal, family or shared calendars in the Calendar App.
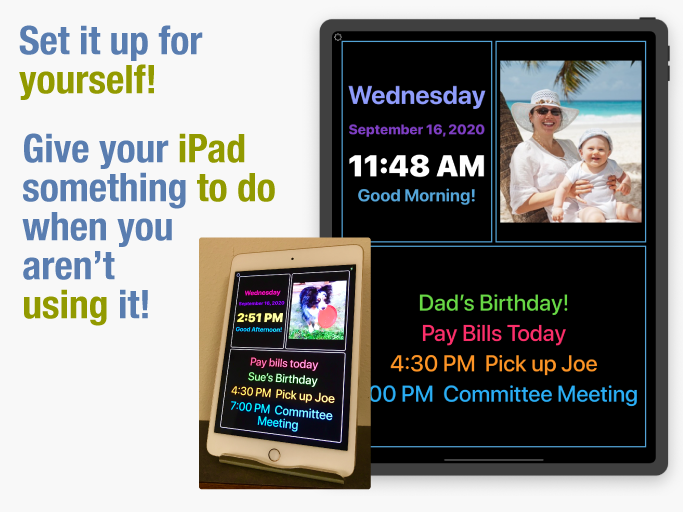
Displayed on an iPad with a stand, Clocke is invaluable for the visually impaired or anyone who wants to easily see the time/day/day of week or calendar events for the day.
Put your iPad or iPhone to work while you aren’t using it!
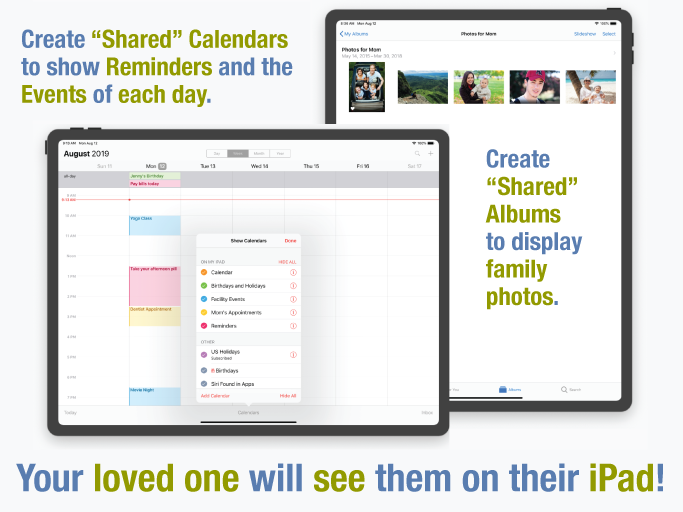
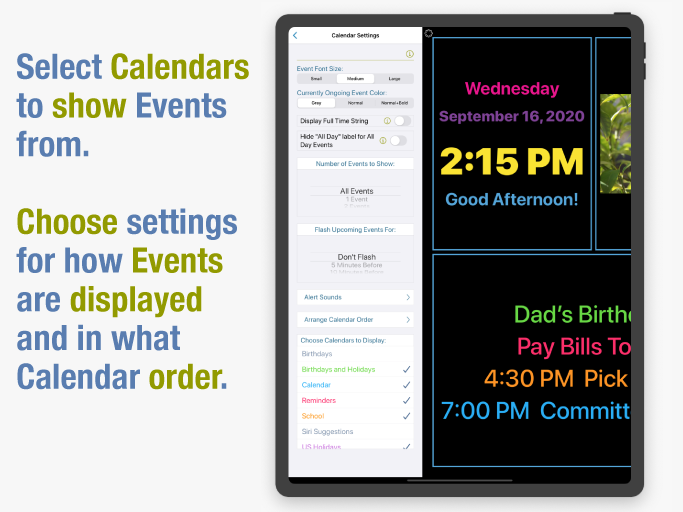
Display Calendar Events – choose from a list of the Calendars you have set up in the Calendar App. Choose the number of events to show, Small/Medium/Large type or, as a reminder have Clocke flash upcoming events. Use "shared" Calendars to be able to add/remove/edit Events remotely.
Name a Calendar "Birthdays and Holidays" to add your own special "All Day" events to be displayed.
Give a calendar the name "Reminders" and these entries will be displayed without times. For example, a Reminder with a Start Time of 10:00 AM and End Time of 10:30 AM could say "Did you take your morning pill?". It would only display during the set time. An "All Day" Reminder could say "Tomorrow is Sue's Birthday", and would be displayed all day.
To Help Keep Family Members Connected – Have your facility create a "shared" Google calendar that you can subscribe to and display in Clocke. Or create your own and add the events that your loved one wants to attend to it.
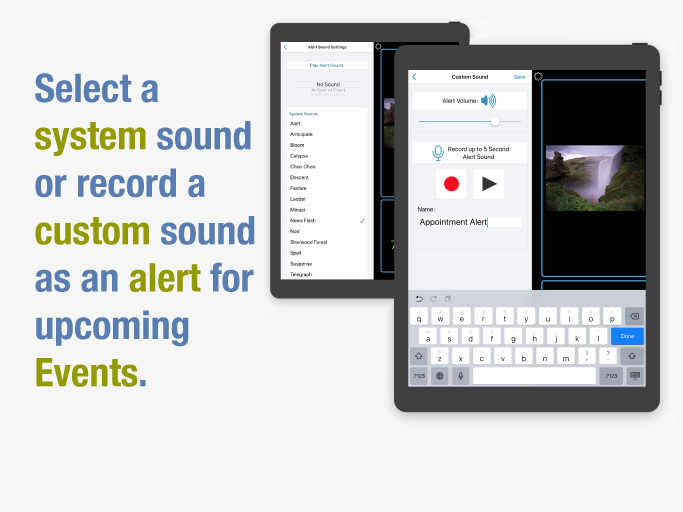
Event Alert Sounds – use a System sound or record a custom sound to play an alert at upcoming Events.
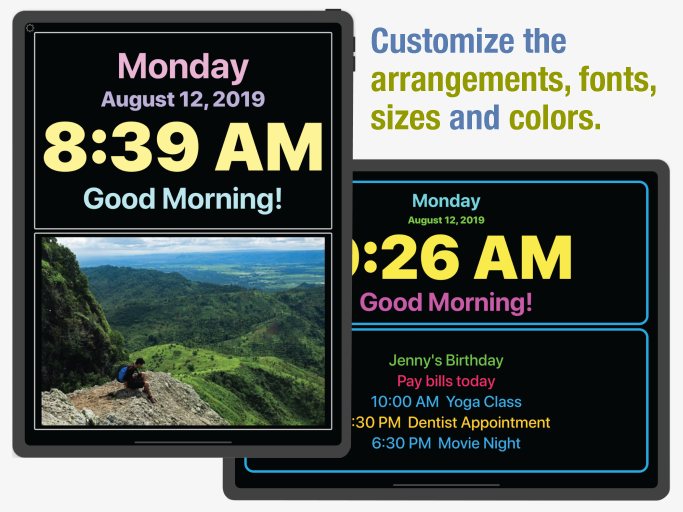
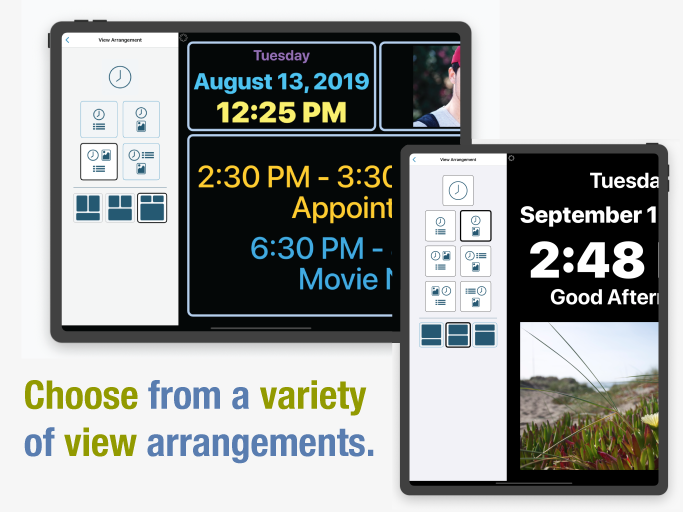
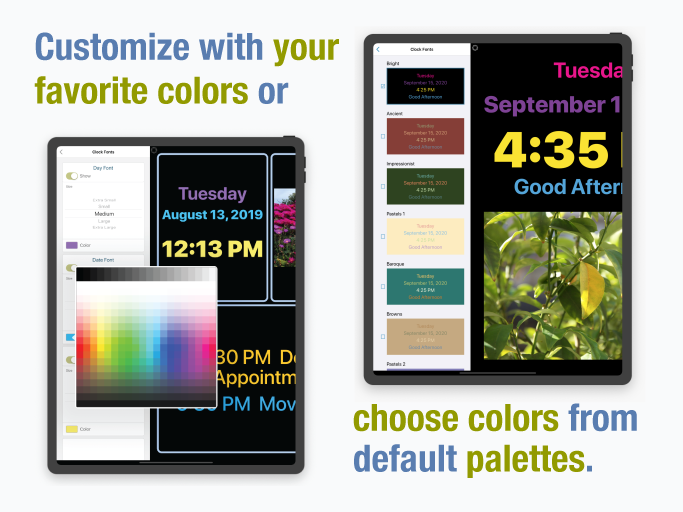
Clock Display – sizes and colors are adjustable. Choose from a variety of display arrangement options.
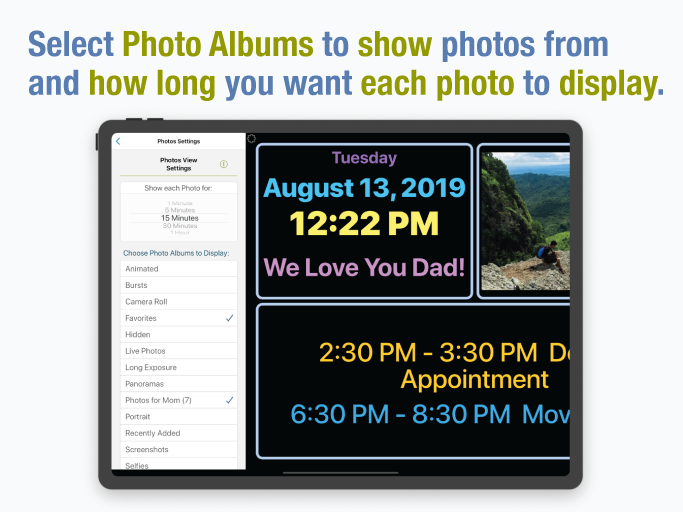
Display Photos – Clocke gives you the ability to display photos from Albums you have set up on your iPad or iPhone. Choose an Album or Albums to display and the amount of time you want each photo to display.
Auto-Dimming On/Off – the display automatically dims at 7:00PM and brightens at 6:00AM by default but these values are customizable. Auto-dimming settings from “Light” to “Extra Dark” are available as well as turning Auto-dimming Off/On/Always On.
Personal Greeting On/Off – an on/off setting is available as well as the ability to add a name to the message. Making the display more personal and comforting is easy by adding a name to the “Good Morning”, “Good Evening”, “Good Afternoon” and “Good Night” message. Parts of the day begin at: Morning 4:00AM, Afternoon 12:00 Noon, Evening 5:00PM, and Night 10:00PM.
Protection from accidental changes – changing the Clocke settings can be set to require a double-tap on the "Settings" button, keeping users from inadvertently making changes or getting confused.
Power "Not Connected" Indicator – we recommend that your device be connected to power while Clocke is in use. An indicator is displayed if the device is not connected to power.
Time Formats – Clocke supports AM/PM and 24-hour time display. It supports displaying the Day, Time, and Date in the current Region setting. Event times are also displayed using the current Region format. Event titles are displayed in the same language that they are input in.
Privacy – Clocke does not collect any user data or display ads. We also recommend that you use a stand for your iPad or iPhone. See the section at the bottom for some stands we like.
Clocke Setup and Help
Download Clocke from the Apple App Store.
When you launch the app, you will see a screen that will give you hints about the main screen icons.
The "Settings" icon is at the top left of the screen and the "No Power" icon is at the top right.
The "No Power" icon is a reminder to plug your iPad or iPhone in when using Clocke.
Note: leaving your iPad or iPhone display "On" does not hurt it or cause a decrease in screen lifespan.
Also, Clocke has settings for controlling the time the screen can be dimmed while you are sleeping. The default setting is to dim at 7:00 pm and brighten at 6:00 am.
If you just want to use Clocke as a clock. It's all set up, you don't have to do anything!
If you want to set up Clocke for someone else and you don't want them to easily make changes, turn the "Double Tap Settings Button to Make Changes" button to "On".
This will mean that in the future you will need to double-tap the "Settings" button whenever you want to make changes.
Screen Dimmer Settings
Tap on "Dimmer Settings". You will have the option of having the screen dim automatically at the specified "Automatic On Time" and return to undimmed at the "Automatic Off Time". Set your desired on/off times.
You also have the option of having the screen dim all of the time or never.
To change the screen background color or add a border and choose it's color and corner radius select "Background and Border".
Customize the Clock
To customize the clock select "Clock Settings".
Show or hide the greeting message by turning the "Show Greeting Message" button "On" or "Off". If you want to add a name to the default Greeting Message type it into the "Custom Name" field.
You can customize the Greeting Message by turning the "Show Alternate Greeting Message" button "On" and typing the message into the "Alt. Message:" field.
Customize the Clock Font Sizes and Colors
Select "Font Sizes and Colors". Choose to show or hide each line of the clock. Select the size of the font and the color.
If you want to select a pre-defined color palette, scroll down and select the color scheme you like.
If you would like to display your Calendar Events or Photos, select one of the view arrangement images.
You can then select the proportions of the screen you would like the sections to display.
If you have selected a View Arrangement that contains Calendar Events you will see "Calendar Settings" as an option on the main "Settings" screen.
From the "Calendar Settings" screen, select options for the font size of your Calendar events, the color of the ongoing event, show the full times of each event: "start time - end time" or just "start time", and show or hide the "All Day" label on all day events. Choose settings for the maximum number of Events you want displayed at a time and whether you want the next Event to flash for an amount of time before it is scheduled to happen.
Alert Sounds
Select "Alert Sounds" to select a System sound to play when an Event is scheduled and select the amount of time before the Event that you want the sound to play. To record your own 5 second sound, scroll to the bottom of the view and select "Record Custom Sound". Press the "Record" button and give the sound a name, "Save" it and then select it in the list of sounds.
Select a Calendar
You must select a Calendar from the list of Calendars that are available in order for the Events to be displayed.
Arrange Calendar Order
If you have selected more than one calendar from the list you can arrange the order that the Calendar Events appear. Select "Arrange Calendar Order" and then drag the listed Calendars into the order you would like. Events from the top Calendar will always display at the top, events from the second Calendar in the list will be displayed next, etc.
Using a "Shared" Calendar
If you are setting the iPad/iPhone up for someone with whom you'd like to share a Calendar with, you will want to create a "Shared" Calendar.
The instructions for creating a "Shared" Apple calendar are here: Instructions for creating Shared Apple Calendars.
The instructions for creating a "Shared" Google/Gmail calendar are here: Instructions for creating Shared Google/Gmail Calendars.
A "Reminders" calendar can be used to remind a loved one or yourself to remember something. The Reminder Event can be displayed all day or during a specific time.
For example, a Reminder with a Start Time of 10:00 AM and End Time of 10:30 AM could say "Did you take your morning pill?". It would only display during the set time.
An "All Day" Reminder could say "Tomorrow is Sue's Birthday", and would be displayed all day.
Create a Calendar named "Reminders". Be sure to select the "Reminders" Calendar in the "Calendar Settings" view.
Reminder Events are displayed without times.
A calendar with the name "Birthdays and Holidays" can be used to show a loved one or yourself a special Event. "Birthdays and Holidays" Events can be displayed all day or during a specific time.
Add family members birthdays to it, selecting the "All Day" switch for each one. You can also add any special family holidays/events this way too.
For example, an "All Day" "Birthdays and Holidays" Event could be titled "Sue's Birthday", and would be displayed all day.
A "Birthdays and Holidays" Event with a Start Time of 6:00 PM and End Time of 8:30 PM could be titled "Sue's Birthday Party" It would only display during the set time.
Be sure to select the "Birthdays and Holidays" Calendar in the "Calendar Settings" view.
If you have selected a View Arrangement that contains Photos you will see "Photos Settings" as an option on the main "Settings" screen.
From the "Photos Settings" screen you can choose the amount of time you want each photo to display and choose the Album or Albums to display photos from.
Selecting an Album of Photos
In order for Photos to display you must select an Album or Albums from the list. If, in your device "Settings" for "Privacy">"Photos">"Clocke" you have chosen "Selected Photos", you must select the Albums that contain those photos.
Setting Up "Shared" Albums
If you are setting the iPad/iPhone up for someone with whom you'd like to share your photos with, you will want to create a "Shared" Album on the device that has the photos on it. See the instructions for doing that here: Instructions for Sharing Albums in Photos on your iPad and iPhone
If you would like to reset all of the Clocke settings select "About Clocke" from the main "Settings" screen, select "Reset Clocke Settings" and confirm.
More features from the "About Clocke" screen
Send us any questions you have via "Submit Feedback".
You can also rate Clocke and visit our website.

